Installing Anaconda
A Complete Python Distribution Tailored for Data Science and Medical Imaging
Reading Time: 15–20 minutes
Prerequisites:
- Basic understanding of Python
- Visual Studio Code installed (recommended)
Learning Objectives
After completing this tutorial, you will be able to:
- Understand what Anaconda is.
- Know the difference between Python and Anaconda.
- Install Anaconda on your computer.
- Create Conda environments.
- Install scientific libraries using Conda.
- Decide when to use Anaconda and when standard Python is a better choice.
Introduction
In the previous lessons, you installed Python and configured Visual Studio Code as your development environment. This setup is sufficient for most programming tasks and many medical imaging projects.
As your projects become more advanced, you’ll need additional libraries for scientific computing, data analysis, visualization, and artificial intelligence. Managing these dependencies can become challenging.
Anaconda simplifies this process by providing a complete scientific Python distribution with hundreds of commonly used packages and a powerful environment manager called Conda.
What is Anaconda?
Anaconda is a free distribution of Python designed for:
- Data Science
- Machine Learning
- Artificial Intelligence
- Scientific Computing
- Medical Imaging
- Research
Instead of installing packages individually with pip, Anaconda includes many of the most popular scientific libraries and provides tools to manage different project environments.
Python vs. Anaconda
| Standard Python | Anaconda |
| Smaller installation | Larger installation |
| Uses pip for packages | Uses conda (and can also use pip) |
| Best for general programming | Best for scientific computing and AI |
| Lightweight | Includes many pre-installed scientific libraries |
| Faster to install | More comprehensive development environment |
For beginners learning Python, the standard Python installation is often enough. As you move into data science and machine learning, Anaconda becomes increasingly valuable.
Why Medical Physicists Use Anaconda
Medical imaging projects often depend on many external libraries:
- NumPy
- SciPy
- pandas
- Matplotlib
- SimpleITK
- scikit-image
- scikit-learn
- TensorFlow
- PyTorch
- MONAI
Anaconda helps manage these libraries and reduces the likelihood of version conflicts.
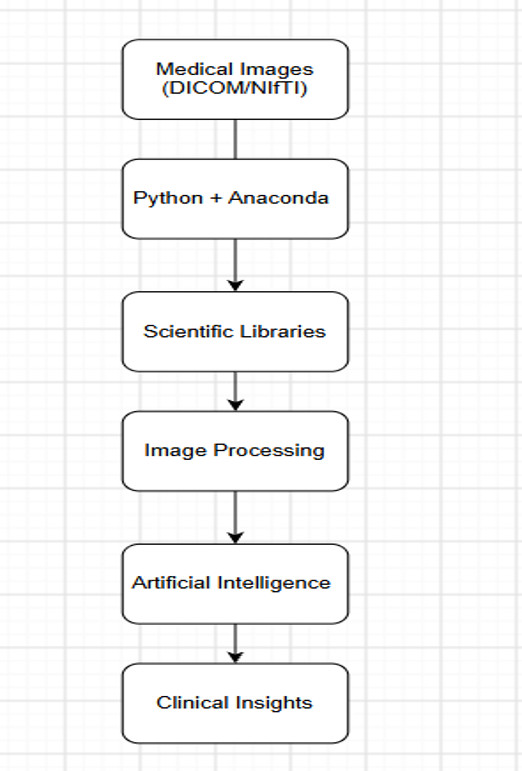
Typical Medical Imaging Workflow
Downloading Anaconda
Download the latest version from the official website:
https://www.anaconda.com/download
Choose the version that matches your operating system:
- Windows
- macOS
- Linux
Installing Anaconda
Run the installer and follow the installation wizard.
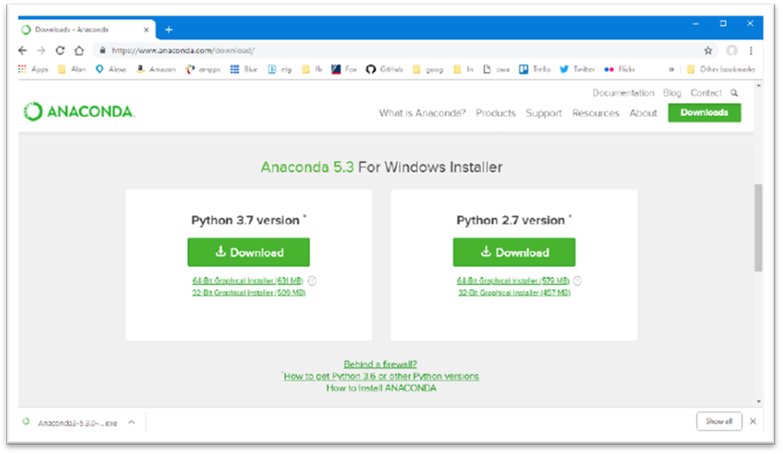
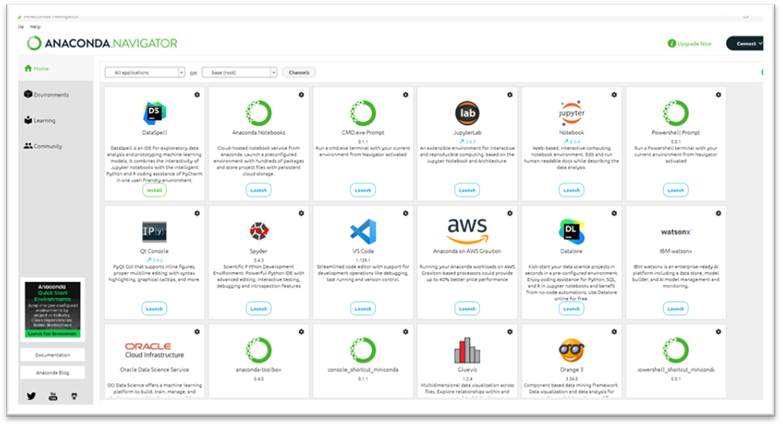
Figure Anaconda navigator ->home page
After installation, you’ll have access to:
- Anaconda Navigator
- Conda
- Jupyter Notebook
- JupyterLab
- Spyder
- Python
Verifying the Installation
Open the Anaconda Prompt (Windows) or your terminal (macOS/Linux) and type:
conda –version
Example output:
conda 25.x.x
Then verify Python:
python –version
Understanding Conda Environments
One of Anaconda’s biggest advantages is the ability to create isolated environments for different projects.
Create a new environment:
conda create –name medimg python=3.14
Activate it:
conda activate medimg
Deactivate it:
conda deactivate
Using separate environments helps keep project dependencies isolated and reproducible.
Installing Packages with Conda
Install NumPy:
conda install numpy
Install pandas:
conda install pandas
Install Matplotlib:
conda install matplotlib
For some specialized medical imaging packages, you may still use pip within a Conda environment.
Using Anaconda with VS Code
You can continue using Visual Studio Code while benefiting from Conda environments.
- Open VS Code.
- Press Ctrl + Shift + P.
- Select Python: Select Interpreter.
- Choose the interpreter from your medimg Conda environment.
This allows you to use VS Code as your editor while Conda manages your project’s Python environment.
When Should You Use Anaconda?
Use Standard Python when:
- Learning Python basics.
- Writing small scripts.
- Creating lightweight applications.
- Working on general programming tasks.
Use Anaconda when:
- Performing data analysis.
- Developing AI models.
- Processing large medical imaging datasets.
- Working with multiple scientific libraries.
- Managing separate environments for different research projects.
Common Beginner Mistakes
Installing Both Python and Anaconda Without Understanding the Difference
Having both installed is perfectly acceptable but be aware of which interpreter your editor is using.
Forgetting to Activate the Environment
If the wrong environment is active, packages may appear to be missing.
Always verify your active environment before running code.
Mixing pip and conda Carelessly
While both tools can coexist, it’s generally best to install packages with Conda first when available and use pip only for packages that are not distributed through Conda.
Best Practices
- Create a separate Conda environment for each project.
- Give environments descriptive names (e.g., medimg, radiomics, deep learning).
- Keep environments focused on the packages each project requires.
- Update packages thoughtfully rather than automatically.
Exercises
Exercise 1
Install Anaconda on your computer.
Exercise 2
Verify the installation using:
conda –version
Exercise 3
Create a new environment named medimg.
Exercise 4
Install NumPy and pandas in your new environment.
Exercise 5
Configure Visual Studio Code to use your medimg environment as the active Python interpreter.
Summary
In this tutorial, you learned:
- What Anaconda is and why it is widely used in scientific computing.
- The differences between standard Python and Anaconda.
- How to install Anaconda.
- How to create and manage Conda environments.
- How to install scientific packages.
- How to integrate Conda with Visual Studio Code.
References:
Anaconda Documentation available att: https://www.anaconda.com/docs/main
Conda Documentation available att: https://docs.conda.io/en/latest
Leave a Reply